Firstly we had to look through all of the clips that we had filmed marking whether they were very good, ok or bad. This took quite along time as we had filmed a lot of clips even though some of them were not great shots. Doing this though, did then help us to know which shots we should use and which ones were bad, therefore not using them. Using our story boards and what we had in our mind, we put together a rough cut of how we wanted it to look. Each time we went to the editing suite we started to make the shots flow better and deleted any shots that we didn't thing worked or fitted in. We had to check that the opening title sequence wasn't to jerky.
 When editing min final cut pro, we added the flash between the pictures. We did this by clicking the 'A' and choosing matte and then clicking colour solid and choosing white. We then had to make it fade in and out so that it looked like a flash had been taken and make it the right length so that it looked like a proper flash.
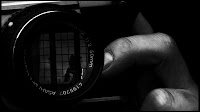
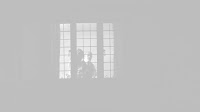
 As we wanted to put out thriller in black and white, we had to wait to do that at the after effects stage. At this stage we also did the reflection shot of what was happening in the window reflecting it into the lens of the camera.
 We used soundtrack pro to choose the sounds that we wanted and added them to the piece. We also used 2 copyright free Cavendish music tracks called doom and one more chance. We had to merge them together due to one of the tracks starting to sound happy. We also heightened the sounds that we had already got when we filmed it such as the footsteps. We had no dialogue which added to the effect of a film noir.
Overall I think editing has gone very well, and I am very pleased with the result.
No comments:
Post a Comment